참고
구조 및 제약(Constraints)
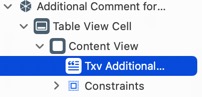
테이블 뷰 섹션 > 셀 > 콘텐트 뷰 > 텍스트 뷰
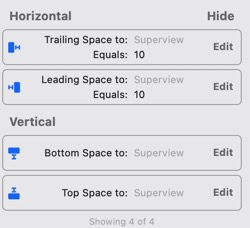
제약: 컨텐트 뷰(상위 뷰)에 맞춤
1) 텍스트 뷰(UITextView)를 선택한 뒤 Indicator > Scroll View > Scrolling Enabled 해제
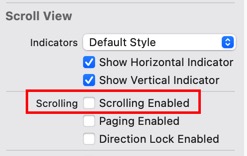
또는 코드에서 직접 설정합니다.
textView.isScrollEnabled = false
2) 해당 인덱스패스 (IndexPath)의 heightForRowAt을 UITableView.automaticDimension으로 설정
override func tableView(_ tableView: UITableView, heightForRowAt indexPath: IndexPath) -> CGFloat {
  if indexPath == <텍스트 뷰가 있는 셀의 인덱스패스> {
    return UITableView.automaticDimension
  }

  return super.tableView(tableView, heightForRowAt: indexPath)
}
3) 텍스트 뷰(UITextView)에 딜리게이트 설정
txvComment.delegate = self
extension SomeTableViewController: UITextViewDelegate { ... }
4) textView(…shouldChangeTextIn…)과 textViewDidChange(_:) 딜리게이트 메서드 구현
extension SomeTableViewController: UITextViewDelegate {
  func textView(_ textView: UITextView, shouldChangeTextIn range: NSRange, replacementText text: String) -> Bool {
    if text == "\n" {
      tableView.scrollToRow(at: <텍스트 뷰가 있는 셀의 인덱스패스>, at: .bottom, animated: false)
    }

    return true
  }

  func textViewDidChange(_ textView: UITextView) {
    tableView.beginUpdates()
    tableView.endUpdates()
  }
}
- textView(…shouldChangeTextIn…)
- 엔터키를 입력했을 경우에는 테이블 뷰의 스크롤을 텍스트 뷰 아래로 이동합니다.
- textViewDidChange(_:)
- 텍스트뷰의 내용이 바뀐 경우 테이블 뷰의 레이아웃만 조정해 입력중인 키보드가 사라지는 것을 방지합니다.


0개의 댓글