참고
- Swift(스위프트): 로컬 알림(Local Notification)을 스케줄에 맞춰 반복 발신하기 (및 한계점)
- Swift: [ChatGPT가 말하는] 로컬 알림(로컬 노티피케이션) 기능의 한계점과 극복 방안
- Swift(스위프트): 백그라운드 작업 (Background Tasks)
시나리오
앱 설명
- 하루에 한 번 공부 자료가 업데이트 되는 어학 앱이 있습니다.
- 월요일 ~ 금요일에만 업데이트가 되고, 주말에는 업데이트가 되지 않습니다.
목표
평일 특정 시간에 30분 간격으로 앱을 열 것을 종용하는 알림을 보냄
알림 스케줄
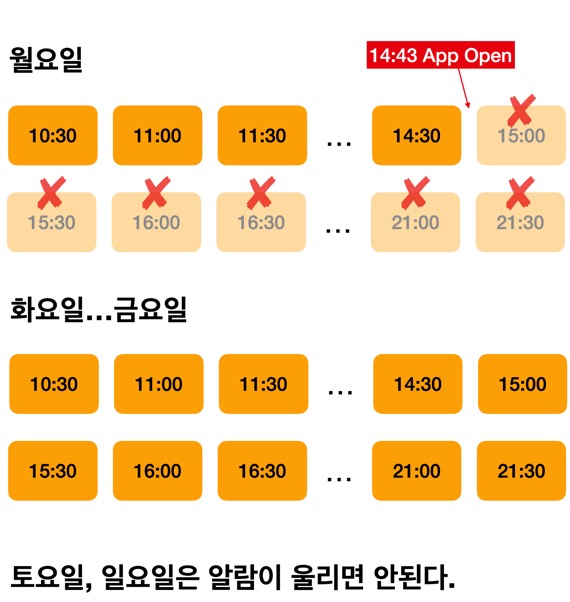
- 월요일 ~ 금요일에 오전 9:30분부터 오후 9:30분까지 30분 간격으로 앱을 열어 공부하라는 로컬 알림(Local Notification)을 보냅니다.
- 앱을 열게 하는 것이 목적이므로 알림을 눌러도 앱을 여는 것 외에 다른 작업은 필요하지 않습니다.
- 앱을 한 번 이상 연 경우, 그 날 남은 알림 스케줄은 모두 취소시킵니다.
- 토요일, 일요일엔 알림이 울리면 안됩니다.
방법
- 앱을 열면 그 날에는 더 이상 알림이 울릴 필요가 없으므로 당일의 남은 알림은 모두 삭제합니다.
- 로컬 알림의 최대 개수가 허용하는 범위 (64개) 내로 다음 날 부터의 알림을 등록합니다.
구현
import UIKit
알림 등록
static func scheduleLocalNotifications() {
let center = UNUserNotificationCenter.current()
// TODO: - 모든 기존 알림 제거?
let content = UNMutableNotificationContent()
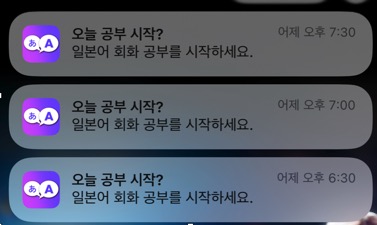
content.title = "오늘 공부 시작?"
content.body = "일본어 회화 공부를 시작하세요."
content.sound = .fastFanfare
let calendar = Calendar.current
// 알림이 등록될 날짜의 다음 날
var currentDate = Calendar.current.date(byAdding: .day, value: 1, to: Date())!
// 10:30부터 21:30까지 30분 간격으로 최대 60개의 알림 등록
let startHour = 9
let endHour = 21
let intervalMinutes = 30
var notificationCount = 0
while notificationCount < 60 {
var dateComponents = calendar.dateComponents([.year, .month, .day, .hour, .minute, .weekday], from: currentDate)
// 토요일(7), 일요일(1)은 제외
guard let weekday = dateComponents.weekday, weekday != 7, weekday != 1 else {
// 다음 날로 이동, notificationCount는 업데이트하지 않음
currentDate = calendar.date(byAdding: .day, value: 1, to: currentDate)!
continue
}
// 9:30부터 21:30까지 30분 간격으로 알림 설정
dateComponents.hour = startHour
dateComponents.minute = 30
while let year = dateComponents.year,
let month = dateComponents.month,
let day = dateComponents.day,
let hour = dateComponents.hour,
let minute = dateComponents.minute,
hour <= endHour && notificationCount < 60 {
let trigger = UNCalendarNotificationTrigger(dateMatching: dateComponents, repeats: false)
let uniqueIdentifier = "Noti_AppOpenPromotion_\(year)_\(month)_\(day)_\(hour)_\(minute)"
let request = UNNotificationRequest(identifier: uniqueIdentifier, content: content, trigger: trigger)
// print("등록대기 \(uniqueIdentifier): \(hour):\(minute) :: \(currentDate)")
center.add(request) { error in
if let error {
print("알림 \(uniqueIdentifier) 등록 실패: \(error)")
return
}
print("알림 \(uniqueIdentifier) 등록 성공: \(hour):\(minute) :: \(currentDate)")
}
notificationCount += 1
dateComponents.minute! += intervalMinutes
if dateComponents.minute! >= 60 {
dateComponents.minute! = 0
dateComponents.hour! += 1
}
}
// 다음 날로 이동
currentDate = calendar.date(byAdding: .day, value: 1, to: currentDate)!
}
- 알림 센터 설정 (2번째 줄):
UNUserNotificationCenter의 현재 알림 센터를 가져와, 알림을 관리할 준비를 합니다. - 알림 내용 구성 (4~7번째 줄):
UNMutableNotificationContent를 사용해 알림의 제목, 본문, 소리를 설정하여, 사용자에게 전달될 알림 내용을 정의합니다. - 다음 날 날짜 설정 (10번째 줄):
Calendar.current.date(byAdding: .day, value: 1, to: Date())를 사용해 현재 날짜에서 하루를 더한 날짜를 설정하여 알림이 다음 날부터 시작되도록 합니다. - 알림 스케줄 초기화 (12~16번째 줄):
알림을 설정할 시간 범위를 9시부터 21시 30분까지, 30분 간격으로 지정합니다. 최대 60개의 알림을 설정할 준비를 합니다. - 주말 제외 처리 (20~26번째 줄):
알림을 등록할 때, 토요일(7)과 일요일(1)을 제외하여 주중에만 알림을 설정하도록 합니다. - 알림 설정 반복문 (28~44번째 줄):
해당 날짜와 시간에 맞는 알림을 생성하여 등록합니다.UNCalendarNotificationTrigger를 사용해 설정된 날짜와 시간에 알림이 발송되도록 하고, 알림의 고유 식별자를 지정하여UNNotificationRequest를 생성합니다. - 알림 추가 및 성공/실패 처리 (46~55번째 줄):
알림이 성공적으로 등록되었는지 확인하고, 실패 시 오류를 출력하며 알림이 정상적으로 추가되었는지 로깅합니다. - 시간 간격 업데이트 (56~61번째 줄):
30분 간격으로 알림을 설정하고, 분 단위가 60을 초과하면 시간을 증가시키며, 이 과정을 통해 알림 시간을 업데이트합니다. - 다음 날로 이동 (63번째 줄):
하루가 끝나면currentDate를 다음 날로 이동시키고, 새로운 날짜에 대한 알림을 설정할 준비를 합니다.
당일 알림 삭제
static func removeTodayNotificationsAfterCurrentTime() {
    let currentDate = Date()
    let calendar = Calendar.current

    // 현재 날짜 및 시간 정보를 가져옵니다.
    let currentYear = calendar.component(.year, from: currentDate)
    let currentMonth = calendar.component(.month, from: currentDate)
    let currentDay = calendar.component(.day, from: currentDate)

    let center = UNUserNotificationCenter.current()

    // 오늘 날짜의 노티피케이션을 삭제
    center.getPendingNotificationRequests { requests in
        for request in requests {
            // 고유 아이디에서 날짜와 시간을 추출
            let identifierComponents = request.identifier.split(separator: "_").map { String($0) }
            guard identifierComponents.count >= 5,
                  let year = Int(identifierComponents[2]),
                  let month = Int(identifierComponents[3]),
                  let day = Int(identifierComponents[4]) else {
                continue
            }

            // 오늘 날짜와 시간이 조건에 맞는지 확인
            if year == currentYear, month == currentMonth, day == currentDay {
                // 조건에 맞는 노티피케이션 삭제
                center.removePendingNotificationRequests(withIdentifiers: [request.identifier])
                print("삭제됨:", request.identifier)
            }
        }
    }
}
- 현재 날짜 및 시간 정보 가져오기 (2~4번째 줄):
Calendar객체를 사용하여 현재 연도, 월, 일을 추출하고 각각currentYear,currentMonth,currentDay에 저장합니다. - 대기 중인 알림 가져오기 (9~10번째 줄):
center.getPendingNotificationRequests를 호출하여 현재 등록된 모든 대기 중인 알림을 가져옵니다. - 알림 식별자 분석 (12~16번째 줄):
각 알림의 고유 식별자에서 연도, 월, 일 정보를 추출하고, 이를 현재 날짜와 비교하여 조건에 맞는 알림을 식별합니다. - 알림 삭제 (18~22번째 줄):
조건에 맞는 알림이 있을 경우center.removePendingNotificationRequests를 통해 해당 알림을 삭제합니다. 삭제된 알림의 식별자는print를 통해 출력됩니다.
뷰 컨트롤러에서 사용 (UIKit)
override func viewDidLoad() {
    super.viewDidLoad()

    // ... //

    // 앱이 백그라운드에서 다시 돌아올 때의 노티피케이션 등록
    NotificationCenter.default.addObserver(self, selector: #selector(appDidBecomeActive), name: UIApplication.didBecomeActiveNotification, object: nil)
}

override func viewWillAppear(_ animated: Bool) {
    super.viewWillAppear(animated)
    // ... //

    setLocalNotiAlarms()
}

override func viewWillDisappear(_ animated: Bool) {
    super.viewWillDisappear(animated)

    // 노티피케이션 옵저버 제거
    NotificationCenter.default.removeObserver(self, name: UIApplication.didBecomeActiveNotification, object: nil)
}

@objc func appDidBecomeActive() {
    // 백그라운드에서 돌아왔을 때 실행할 함수
    setLocalNotiAlarms()
}

private func setLocalNotiAlarms() {
    LocalNotiSchedulingService.removeTodayNotificationsAfterCurrentTime()
    LocalNotiSchedulingService.scheduleLocalNotifications()
}
- viewDidLoad에서의 노티피케이션 등록:
NotificationCenter.default.addObserver를 사용하여 앱이 백그라운드에서 다시 활성화될 때 호출될appDidBecomeActive함수를 등록합니다.UIApplication.didBecomeActiveNotification이벤트를 옵저버링합니다. - viewWillAppear에서의 알람 설정:
setLocalNotiAlarms()를 호출하여 화면이 표시될 때 로컬 알림을 설정합니다. - viewWillDisappear에서의 옵저버 제거:
화면이 사라질 때, 등록한NotificationCenter의 옵저버를 제거하여 더 이상 앱 활성화 상태 변화를 감지하지 않도록 합니다. - appDidBecomeActive 함수:
앱이 백그라운드에서 다시 활성화되면 호출되며,setLocalNotiAlarms()를 다시 실행하여 로컬 알림을 새로 설정합니다. - setLocalNotiAlarms 함수:
LocalNotiSchedulingService.removeTodayNotificationsAfterCurrentTime()을 통해 현재 시각 이후의 알림을 삭제하고,LocalNotiSchedulingService.scheduleLocalNotifications()을 호출하여 새로 알림을 등록합니다.


0개의 댓글