이전 글
원문 – Apple Pencil Tutorial: Getting Started
Swift 5 버전에 맞춰 원문을 변경하였습니다.
손가락 대 펜슬
그림을 그리는 도중 여기저기서 몇 가지 스케치 오류를 범했을 것이며 잘못된 선을 지울 수 있기를 바랄 것입니다.
이 섹션에서는 Apple Pencil과 손가락 사용을 구별하는 방법을 살펴보겠습니다. 더 구체적으로 말하면, 손가락이 충실한 지우개 역할을 할 수 있도록 앱을 구성할 것입니다.
손가락이나 Apple Pencil이 사용되는지 확인하는 것은 매우 쉽습니다. UITouch의 type 속성을 사용하기만 하면 됩니다.
CanvasView 상단에 지우개 색상에 대한 속성을 추가합니다. 캔버스 뷰의 배경색으로 칠하면 지우개 역할을 하는 듯한 착각이 들 것입니다. 영리하죠? :]
private var eraserColor: UIColor {
  return backgroundColor ?? UIColor.white
}
여기에서 nil이 아니라면 eraserColor를 뷰의 배경색으로 설정합니다.
다음으로 drawStroke(_:touch:)에서 다음 코드를 찾습니다.
if touch.altitudeAngle < tiltThreshold {
    lineWidth = lineWidthForShading(context, touch: touch)
} else {
    lineWidth = lineWidthForDrawing(context, touch: touch)
}
이 부분을 다음으로 교체하세요.
if touch.type == .stylus {
    if touch.altitudeAngle < tiltThreshold {
        lineWidth = lineWidthForShading(context, touch: touch)
    } else {
        lineWidth = lineWidthForDrawing(context, touch: touch)
    }
    pencilTexture.setStroke()
} else {
    lineWidth = 20
    eraserColor.setStroke()
}
여기에 펜슬인지 손가락인지 확인하는 검사를 추가했으며 후자의 경우 선 너비를 변경하고 지우개 색상을 사용하여 그림을 그립니다.
빌드 및 실행합니다. 이제 지저분한 가장자리를 정리하거나 손가락으로 모든 것을 지울 수 있습니다!
손가락을 통한 가짜 압력
그건 그렇고, iOS 8 이후로 손가락으로 압력(force)을 속일 수 있다는 것을 알고 계셨나요? UITouch에는 이름에서 알 수 있듯이 터치 크기를 유지하는 MajorRadius라는 속성이 선언되어 있습니다.
바로 방금 전에 작성했던 코드 블록에서 다음 줄을 찾습니다.
lineWidth = 20
이 부분을 다음으로 교체하세요.
lineWidth = touch.majorRadius / 2
빌드 및 실행합니다. 어두운 영역을 음영 처리한 다음 손가락 끝과 손가락의 평평한 부분으로 지우면 다양한 두께가 표시됩니다.
레이턴시(latency) 줄이기
펜슬이 iPad의 표면을 확대하고 선을 그으면 그 어느 때보다 빠르게 반응한다고 생각할 수 있습니다. 별로 그렇지는 않습니다.. 터치와 선이 렌더링되는 시간 사이에 레이턴시(latency)이 있기 때문에 환상이라고 할 수 있습니다. Apple은 이를 처리하기 위한 속임수를 사용하고 있습니다. 바로 터치 예측(touch prediction)입니다.
놀랍겠지만 Apple은 당신의 연필이나 손가락이 어디를 그릴지 미리 알고 있습니다. 이러한 예측은 UIEvent의 배열에 저장되어 미리 예측된 터치를 그릴 수 있습니다. 얼마나 멋진가요!? :]
예측된 터치로 작업을 시작하기 전에 극복해야 할 작은 기술적 장애가 있습니다. 현재 그래픽 컨텍스트에서 획을 그리면 캔버스 뷰에 즉시 표시됩니다.
예측된 터치(후보정된 터치)를 캔버스에 그려야 할 필요가 있지만 실제 터치가 예측된 터치와 다르다면 예측된 터치를 버려야 합니다.
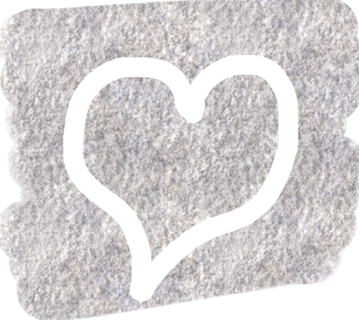
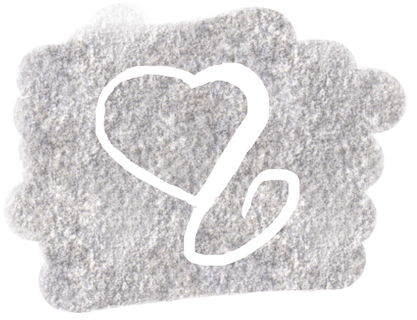
예를 들어 S자 모양을 그릴 때 곡선을 예측하지만 도중에 방향을 바꾸면 예측이 잘못되어 폐기해야 합니다. 이 그림은 이러한 문제를 보여줍니다. “S”(실제 터치)는 빨간색으로 표시되고 예측된 터치는 파란색으로 표시됩니다.

이 문제를 피하기 위해 코드에서 수행해야 하는 작업은 다음과 같습니다.
- 그래픽 컨텍스트에서 예측되지 않은 실제 터치를 캡처하기 위해
drawingImage라는 새UIImage속성을 만듭니다. - 각 터치의 이동 이벤트에서
drawingImage를 그래픽 컨텍스트에 그립니다. - 실제 터치는 그래픽 컨텍스트에 그려지며 캔버스 뷰에서
image를 사용하는 대신 새drawingImage에 저장합니다. - 예측된 터치는 그래픽 컨텍스트에 그려집니다.
- 예측된 터치로 완성된 그래픽 컨텍스트는 사용자에게 표시되는
canvasView.image로 푸시됩니다.
이런 식으로 예측된 터치가 drawingImage에 그려지지 않으며 터치 이동 이벤트가 발생할 때마다 예측이 삭제됩니다.
하우스키핑: 그리기 예측 삭제
스트로크가 끝날 때 또는 사용자가 그리기를 취소할 때 예측된 터치가 적절하게 처리되도록 하기 위해 약간의 정리 작업이 필요합니다.
CanvasView의 맨 위에 적절하게 그려진 이미지(예측이 없는 이미지)를 유지하기 위한 새 UIImage 속성을 추가합니다.
private var drawingImage: UIImage?
다음으로 touchMoved(_:withEvent:)에서 다음 구문을 찾습니다.
image?.draw(in: bounds)
이것을 다음으로 교체합니다.
drawingImage?.draw(in: bounds)
여기에서는 캔버스 보기에서 화면에 표시되는 이미지가 아니라 drawingImage를 그래픽 컨텍스트에 그립니다. 이것은 이전 이동 이벤트에 의해 그려진 예상 터치를 덮어씁니다.
이제 touchMoved(_:withEvent:) 의 맨 아래에 있는 코드를 찾습니다.
image = UIGraphicsGetImageFromCurrentImageContext()
UIGraphicsEndImageContext()
이 코드의 바로 위에 다음 코드를 추가합니다.
// 1
drawingImage = UIGraphicsGetImageFromCurrentImageContext()
// 2
if let predictedTouches = event?.predictedTouches(for: touch) {
    for touch in predictedTouches {
        drawStroke(context, touch: touch)
    }
}
- 그려진 새 획으로 그래픽 컨텍스트를 저장하지만 예측된 획은 포함하지 않습니다.
- 병합된 터치(coalesced touches)와 마찬가지로 예측된 터치의 배열을 가져오고 각 예측된 터치에 대한 획을 그립니다.
이제 다음 두 가지 메서드를 추가합니다.
override func touchesEnded(_ touches: Set<UITouch>, with event: UIEvent?) {
  image = drawingImage
}

override func touchesCancelled(_ touches: Set<UITouch>?, with event: UIEvent?) {
  image = drawingImage
}
이 메서드들은 스트로크가 끝날 때 호출됩니다. 터치가 종료되거나 취소될 때 이미지를 drawingImage로 바꾸면 캔버스에 그려진 예측된 모든 터치가 삭제됩니다.
마지막으로 한 가지: 지우기를 위해 (기기를) 흔들면 캔버스와 실제 그림을 모두 지워야 합니다.
CanvasView.swift의 clearCanvas(animated:)에서 애니메이션 클로저 내에서 다음 코드를 찾습니다.
self.image = nil
이 라인 바로 밑에
self.drawingImage = nil
코드를 추가합니다.
이 메서드의 else 문에 있는 아래 구문도
image = nil
바로 밑에
drawingImage = nil
코드를 추가합니다.
이 구문을 통해 작업한 그림의 두 이미지를 모두 지웁니다.
빌드 및 실행합니다. 구불구불한 선과 곡선을 그립니다. Apple이 예상한 모든 터치를 그리고 있으며 결과적으로 인지되는 레이턴시가 감소한다는 것을 알 수 있습니다. 매우 미묘하기 때문에 주의 깊게 관찰해야 할 수도 있습니다. :]

CanvasView.swift 전체 코드
import UIKit

let π = CGFloat(Double.pi)

class CanvasView: UIImageView {

    // image -- the one without predictions:
    private var drawingImage: UIImage?

    // You can tweak this forceSensitivity constant to make your stroke width more or less sensitive to pressure.
    private let forceSensitivity: CGFloat = 4.0

    // This will allow you to use pencilTexture as a color to draw with, instead of the default red color you’ve used up until now.
    private var pencilTexture = UIColor(patternImage: UIImage(named: "PencilTexture")!)

    private let tiltThreshold = π/6  // 30º

    // This will be the narrowest that a shading line can be -- you can change it to suit your own personal shading tastes.
    private let minLineWidth: CGFloat = 5

    // Parameters
    private let defaultLineWidth:CGFloat = 6

    private var drawColor: UIColor = UIColor.red

    private var eraserColor: UIColor {
      return backgroundColor ?? UIColor.white
    }

    override func touchesMoved(_ touches: Set<UITouch>, with event: UIEvent?) {
        guard let touch = touches.first else { return }
        // print(touch.azimuthUnitVector(in: self))


        UIGraphicsBeginImageContextWithOptions(bounds.size, false, 0.0)
        let context = UIGraphicsGetCurrentContext()

        // Draw previous image into context
        drawingImage?.draw(in: bounds)

        var touches = [UITouch]()

        if let coalescedTouches = event?.coalescedTouches(for: touch) {
          touches = coalescedTouches
        } else {
          touches.append(touch)
        }

        print(touches.count)

        for touch in touches {
            drawStroke(context, touch: touch)
        }

        drawingImage = UIGraphicsGetImageFromCurrentImageContext()
        if let predictedTouches = event?.predictedTouches(for: touch) {
            for touch in predictedTouches {
                drawStroke(context, touch: touch)
            }
        }

        // Update image
        image = UIGraphicsGetImageFromCurrentImageContext()
        UIGraphicsEndImageContext()
    }

    override func touchesEnded(_ touches: Set<UITouch>, with event: UIEvent?) {
      image = drawingImage
    }

    override func touchesCancelled(_ touches: Set<UITouch>?, with event: UIEvent?) {
      image = drawingImage
    }

    private func drawStroke(_ context: CGContext?, touch: UITouch) {
        let previousLocation = touch.previousLocation(in: self)
        let location = touch.location(in: self)

        if touch.type == .stylus {
            if touch.altitudeAngle < tiltThreshold {
                lineWidth = lineWidthForShading(context, touch: touch)
            } else {
                lineWidth = lineWidthForDrawing(context, touch: touch)
            }
            pencilTexture.setStroke()
        } else {
            lineWidth = touch.majorRadius / 2
            eraserColor.setStroke()
        }

        // Configure line
        if let context = context {
            context.setLineWidth(lineWidth)
            context.setLineCap(.round)

            // Set up the points
            context.move(to: previousLocation)
            context.addLine(to: location)

            // Draw the stroke
            context.strokePath()
        }

    }

    private func lineWidthForDrawing(_ context: CGContext?, touch: UITouch) -> CGFloat {
        var lineWidth = defaultLineWidth
        if touch.force > 0 {
          lineWidth = touch.force * forceSensitivity
        }
        return lineWidth
    }

    func clearCanvas(animated: Bool) {
        if animated {
            UIView.animate(withDuration: 0.5, animations: {
                self.alpha = 0
            }, completion: { finished in
                self.alpha = 1
                self.image = nil
                self.drawingImage = nil

            })
        } else {
            image = nil
            drawingImage = nil
        }
    }

    private func lineWidthForShading(_ context: CGContext?, touch: UITouch) -> CGFloat {

        let previousLocation = touch.previousLocation(in: self)
        let location = touch.location(in: self)

        // 2 - vector1 is the pencil direction
        let vector1 = touch.azimuthUnitVector(in: self)

        // 3 - vector2 is the stroke direction
        let vector2 = CGPoint(x: location.x - previousLocation.x, y: location.y - previousLocation.y)

        // 4 - Angle difference between the two vectors
        var angle = abs(atan2(vector2.y, vector2.x) - atan2(vector1.dy, vector1.dx))

        if angle > π {
            angle = 2 * π - angle
        }
        if angle > π / 2 {
            angle = π - angle
        }

        let minAngle: CGFloat = 0
        let maxAngle = π / 2
        let normalizedAngle = (angle - minAngle) / (maxAngle - minAngle)

        let maxLineWidth: CGFloat = 60
        var lineWidth = maxLineWidth * normalizedAngle

        let minAltitudeAngle: CGFloat = 0.25
        let maxAltitudeAngle = tiltThreshold

        let altitudeAngle = touch.altitudeAngle < minAltitudeAngle ? minAltitudeAngle : touch.altitudeAngle

        let normalizedAltitude = 1 - ((altitudeAngle - minAltitudeAngle) / (maxAltitudeAngle - minAltitudeAngle))

        lineWidth = lineWidth * normalizedAltitude + minLineWidth

        let minForce: CGFloat = 0.0
        let maxForce: CGFloat = 5

        let normalizedAlpha = (touch.force - minForce) / (maxForce - minForce)

        context?.setAlpha(normalizedAlpha)

        return lineWidth
    }
}


0개의 댓글